
New Uses For Old Shoes and Hats
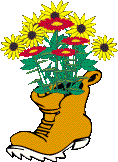
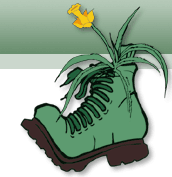
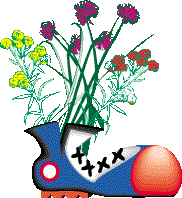
Old shoes and hats make some of the cutest and most whimsical planters. Plus you are recycling your worn out shoes and out of style hats! It is also a lot of fun. Any old shoe will do (except for sandals perhaps). Ladies high heel pumps are really cute and old loafers or boots are a great look too. Straw hats with wide floppy brims, fedoras, baseball caps or just about any old hat will look great.
You will need: Hats and/or shoes, potting soil, plants and
fertilizer.
Shoe Planters
Pack the soil into the toes of the shoes firmly. Leave some
room for the root ball though. Place the plant in the shoe opening and pack the
soil around the roots leaving a small lip around the rim for watering. Fertilize
with a slow release formula such as ozmicote. Water the plant
well.
If you want to mount the shoe onto a wall or door then you
should nail the shoe to the wall and then place the plant in the shoe with the
soil. You can also use a hook to mount the shoe on the wall, then after placing
the soil and plant in the shoe mount it on the hook. Mounting the shoes on a
wall with the sole resting on the wall is a very cute way to display this craft.
Small delicate flowers are the best to use for this
project.
Impatiens, lobelia, sweet alyssum, sweet william, dianthus,
violas, pansies are all great choices. A striking arrangement for full sun is an
assortment of small succulents. Donkey tail will trail down and cascade over a
tall boot. There are so many choices and that is what makes this project so much
fun. You can experiment and be creative and change whatever you don't like!
Kids love to get involved with this project.
HATS
Hats offer greater plant material choices because they are
generally larger than shoes. Sunhats with dwarf flowers such as stock or snap
dragons and a border around the rim in a contrasting color looks great. Using
ivy or other trailing plants for the border around the rim so that it trails
over the edges is another great choice.
If using the hat planter indoors or on a surface you want to
keep dry, line the hat with heavy plastic and trim it to fit and then place a
drip tray under it for added security before you add the soil and plants. Water
this lined planter less because it will have no drainage holes in the bottom. If
you prefer you can keep the hat unlined and take it outside to water it, letting
it drain well then place it on a drip tray on the table inside.
These projects are fun to get the kids involved in and are a
great way to add interest and whimsy to a garden.